Wednesday, January 15, 2014

Hollywood Word Project

This weekend, my roommate Wendy and I decided to finally add some decor to our barren living room. We browsed for an hour or so through all our decorating pins on Pinterest and finally decided on one. 
I call it, out Hollywood Word Project!
This is the original pin photo

So, having just moved in, we had tons of boxes just lying around the house. It seemed fitting that we would choose a project that was cheap (cause lets face it, we broke!) and could utilize things we had around the house.
Aside from the lights, we had everything to complete this project.
1- Cut up the boxes and form the letters. Duct tape or masking tape is a must for this step. Forget glue until later. It helped when we found a box that was generally equally proportioned and most of our letters were made from that.
2- Make the letters 3D. You can't really tell from my picture, but the filling of the F is not at the back of the letter, but in the middle of the walls...if that makes sense. Just think of it as, you have to poke lights through it, so you'll need room to hide them behind the letter and you also need space in the front of the letter to give a glowing effect. (I think I may have just confused myself haha)


3- Spray paint your letters, or paint with craft paint. I sprayed the walls of the letters black so that they would match with anything else we put in the living room.
4- Get a backing. In the original pin, they did not do this. We improvised a little. We grabbed a bunch of our left over boxes and made a backing for our letters to hang on. We covered that backing with poster board and then sprayed the whole thing silver to make the letters pop.
5- Punch holes in your letters. This is where your lights will go through. I had to tape the back of every light so that they wouldn't fall out. It took some time, so be patient.
6- Glue the letters to the board. We used hot glue and it has held up well. I hot glued the crap out of that thing!
7- (This step is completely optional) String the lights around the board. We had so many lights left over that we had enough to border the board. I taped them on and then sprayed the cord. This was a lot of work because I had to put tape over every light. But it was worth it! All the cord is silver and it matches.
8- "Frost" your letters. The pin calls for tracing paper, but we only had tissue paper. The point is, you don't want people seeing all the cords and the actual lights, so we put tissue paper over the letters. It gives it a nice frosted look when you turn the lights on.
9- FINAL STEP. Hang it up. This step took 3 people, including myself. Since it's all made from cardboard, its a little flimsy, so I had two of my friends support it while I hammered it into the wall. 
Viola! Your own personalized Hollywood worthy sign.
This can be made to say anything you want it to say! That's the cool thing about it. 


All in all this project cost us $4! We already had some spray paint from another project we'd worked on before and we, of course, had the boxes. All we had to buy were the lights, which right after Christmas, everything was 75% off!
We improvised a lot of this (because we can't do anything the easy way). The original tutorial has a few different steps, but after all is said and done, it looks awesome!
Our project took us a few days, but we took a lot of breaks and watched a movie as we did this haha. It will definitely take some time. And can I just say, it is much too cold outside right now to be spray-painting!
You can view the original tutorial here
Happy crafting.
If anyone attempts this, I would love to hear about it!

Monday, December 30, 2013

Down the Rabbit Hole

Alice in Wonderland has inspired many creations from art to jewelry to fashion. I decided to try my hand at something inspired from that crazy story.
It helped that in my last box of beads, I found cute little chair charms! 
The first thing I had to do was think of the essence of Alice in Wonderland. I figured that the movie was made of locks and keys and "drink me" drinks and "eat me" cookies, flowers and cards!
So, I searched through my stash and looked for items that would match these elements.

FALLING


             DOWN


                               THE

                             
                                               RABBIT


                                                                   HOLE!


I came up with red beads for the Red Queen, mushrooms (because lets face it, this story was made by someone who was obviously on these), a lock, a chair, flowers and some pearls for the innocence of Alice.
All of these items come from the awesome Blue Moon Bead line!


Saturday, December 14, 2013

A little taste of Industrial

If you've been following my blog, you'll know that I absolutely love Steampunk! It's the coolest style of jewelry in my opinion. Industrial jewelry is so unique and nothing comes out looking the same, I think that is why I like it so much.
Whenever I'm at craft fairs, it always amazes me who buys my Steampunk items. It's usually not who I thought would buy it. I even have cute little old ladies say they absolutely have to have it!
In July of 2014 I plan on having a booth at the Steamfest in Ogden and I'm so excited! I've been making tons of Steampunk items.
But just because it's industrial doesn't mean that it had to be huge and chunky and weigh a million pounds. In fact, I am on a mission to prove that stereotype wrong. I want to create a line where you can wear a little bit of steampunk with your outfit daily! 


Here is one of my newest earrings. I made these with fun Blue Moon Beads from a bead tin. All I added was silver gears and Viola, a perfect Steampunk creation that doesn't weigh a ton and will not kill your ears by the end of the day.


I like them because they are simple enough to wear with any outfit, but still make a statement.

Layer those Bracelets!

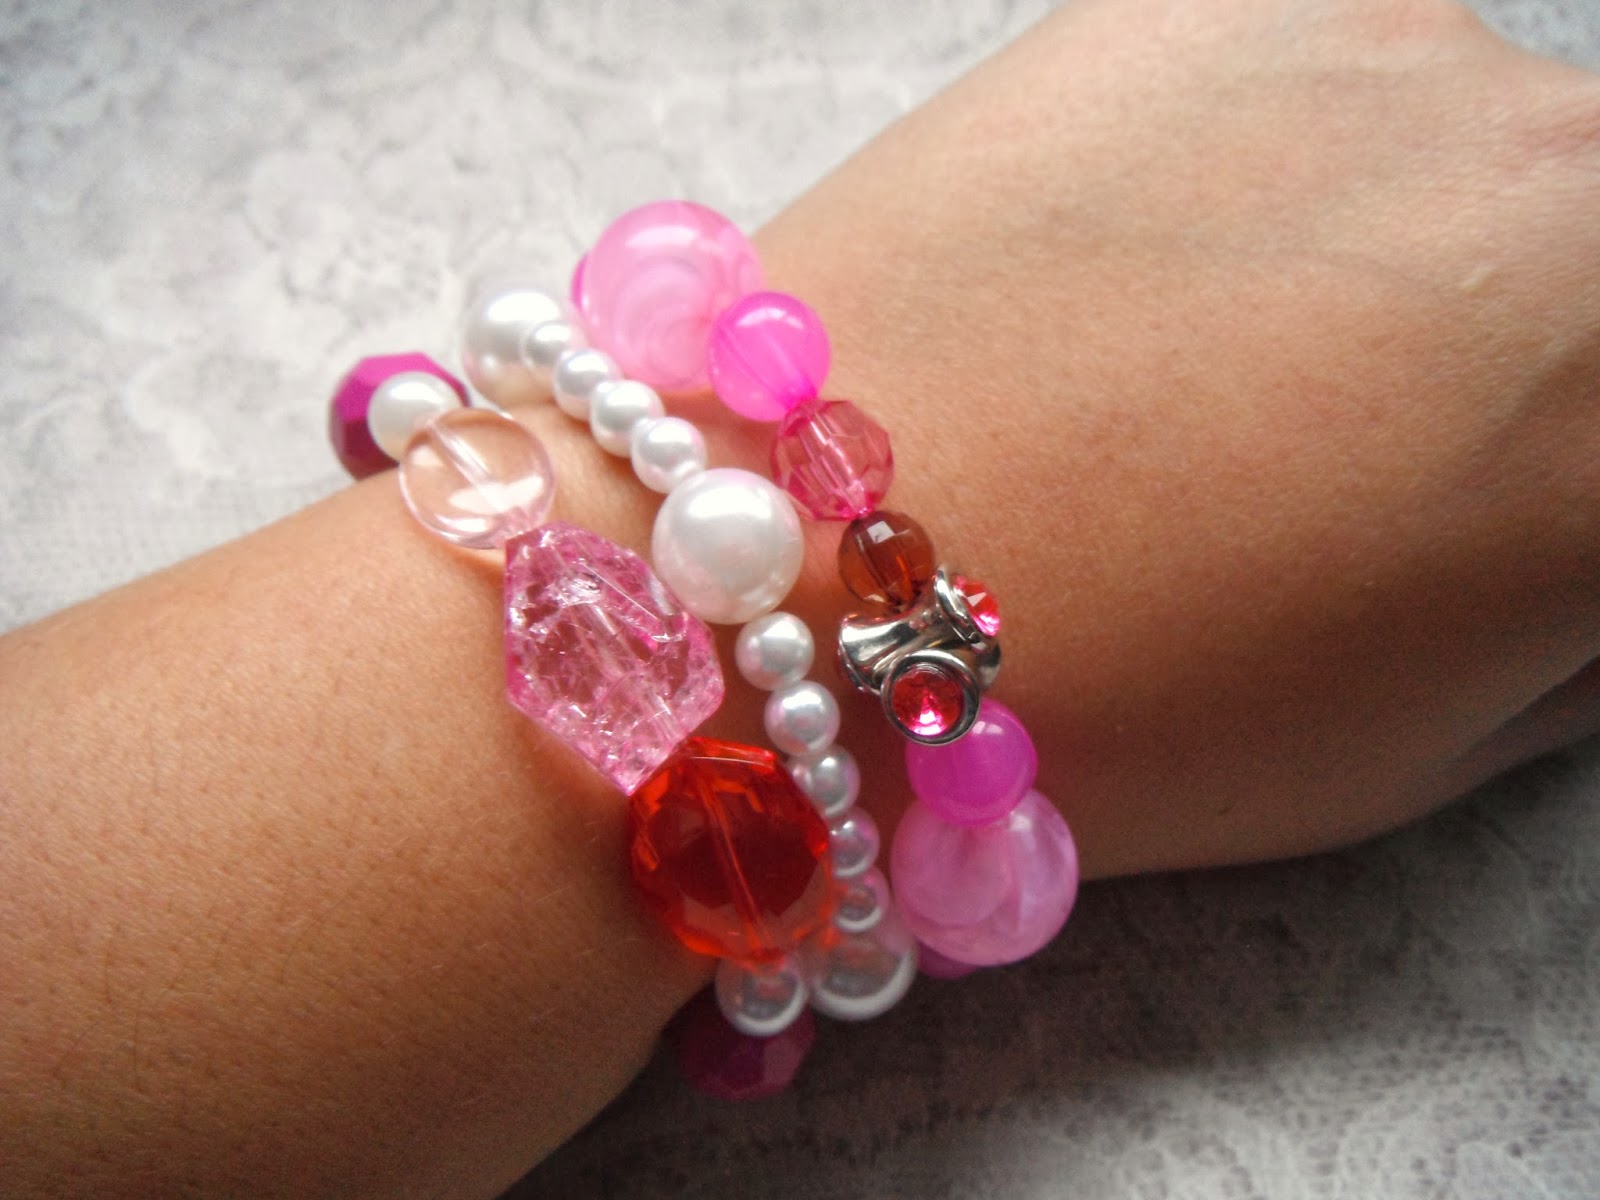
If you haven't noticed, layered bracelets are in style right now. I've tried my hand at a few different styles of them, but I've found that by far, the easiest ones to make are the stretchy kind. 
If you're a lazy person like me, than this project is for you!
Grab a bunch of fun beads that coordinate well and some stretch cord.


I set them up on my bracelet pallet, which has three rows, and I moved the beads around until I had three fun bracelets to string together. (Honestly, choosing them takes longer than actually putting all three bracelets together)


String them. Then layer them. I made a few bracelets with the same basic color scheme so I could mix and match.

The cool thing about this, is you could just wear one, or all three, or even four! Let your imagination run wild.


The Gift of Creativity!

Like a lot of people now-a-days, money is tight in my household as well.
With Christmas less than a month away, it's time to search the couch, inside out all pockets and scrounge for money to buy Christmas gifts.
But what happens when all of that searching comes up empty? That just means it's time to get creative!
I don't know about you, but for me, everyone kind of expects jewelry from me now...I mean, it is my hobby. So, this year, I'm throwing them a fast one. I won't be making jewelry, but instead, gifting creativity!
I've seen jar gifts all over Pinterest and I always thought that was a good idea. People can use Jars for so much, so it's like two gifts in one!


With a $3 jar from Walmart, I began to weed through my stash of beads (and a crazy stash it is) and other artsy things to put in this "Creative Jar".
I tried to add in a little bit of everything. For example: Buttons, Beads (glass, ceramic, fabric, wood), pendants (Glass, wood, stone), Charms, Velcro, Glue, Gears, Hair accessory, findings, etc...
Basically, anything that I thought could be used in a project, went into the jar.


It looks like a jumbled mess (it kinda is), the idea is to inspire creativity in the recipient. 
The person that I'm gifting this to, is a craft junkie and so I think that at least a few things in this jar will be used. If anything, it will be fun to look through and discover what is in the jar.
I slapped on some ribbon and a cute tag and there you have it. A perfectly presentable and cost manageable gift.

The great thing about the Creative Jar is that you can make them with pretty much any craft.
If you scrapbook, cut up some fun shapes and strips from your scraps and put them in there. 
If you sew, gather your scraps and make a "Scrap Quilt Kit".
The list goes on and on. 

Side note: Making this jar is a great way to de-clutter some of your craft supplies. It's also a way to give something a second chance at actually being made into something. I don't know about you, but my collection has grown so great that there is no way that I could make all the things I originally planned on making. 

There you have it. I hope that helps some of you who were wondering what to gift someone.
If you make a Creative Jar, I would love to hear about it!

Thursday, November 28, 2013

No Chain, No gain

Chain is an awesome addition to any jewelry piece. If you add an extra layer of chain to a necklace, it can completely transform the style.
Want a simple necklace? Slap a pendant on a thin chain!
In my workings with chain, I've learned which style, size and colors I like best. I use chain a lot!
So, what do you do with all those small scraps of chain left over from all your projects? You know what I'm talking about, the five or six links that were left of a certain chain that you couldn't bring yourself to throw away. Don't deny it!
Well, here's a project that can help clean up all those baby scraps.


Gather your scraps of similar color (or you can do complete opposite colors for a more spunky necklace) and link them together.
Doesnt matter the size link or length, put them all together in a way that makes you happy. Then add a fun strand of beads to pull it all together. 


With this necklace, I added a fun leaf pendant from Blue Moon Beads Stone Age collection as well as a metal backing from their Urban Warrior line.
I made a fun pattern with beads and spacers to complete my bead strand. All in all, this necklace is different from anything you see out there! Another fun fact, even if you made more than one, no two would come out the same.


So dig through your scraps and let your creativity soar!
It would be just as simple to make a bracelet with chain scraps. Experiment.
I'd love to see what you make!

Saturday, November 2, 2013

Strands and Ribbon


I found the prettiest blue beads and knew I had to make a necklace worthy of them! 


I used some natural stone from the Stone Age line from Blue Moon Beads and a few fun colors of seed beads. 
It was simple to string them and then twist them, I used brown ribbon to accent the cool colors.
I like it!