Wednesday, April 2, 2014

Chunky Bracelet


Who doesn't love stretchy bracelets? I love the layered look that is in style, but there is also the bulky look.
There are a lot of pluses to the bulky look vs layered.


First of all, you need less bracelets...like one!
If you can find a fun bracelet that compliments your outfit and is bulky, then you're done. No searching for three other bracelets that match different shades in your shirt or anything.


Blue Moon Beads offers so many options in their bulky beads. These are drilled with two holes, to make stringing them super simple!


String them with stretchy cord and you've got a comfortable and stylish bracelet!


So many colors, so little time!


So, what's your vote? Layered or bulky?


Style Stretch

So, my latest box of beads came full of pendants, chains and beads that I normally wouldn't choose to make jewelry with.
It took me a while; long hours of staring at all these items and wondering what I was going to do with them.
All I needed to do was open my eyes! If you look around, big and bulky beads are in style right now, and so, inspiration was laying around every corner.


"Statement" jewelry is what it's called. For this necklace, I tried to balance a few good statement pendant with softer tones. 
Though this necklace didn't take me very long to make, it still makes a statement, which is the point!
Blue Moon Beads has a huge line of big beads for every taste out there!


It was kind of fun, to stretch my creativity in a way I never thought about before.

I made fun earrings, they aren't meant to go with the necklace, but they were just as easy to make!


I took a few pendants and slapped on some chain. These dangles are fun because they are lightweight and completely unique!


So, if you haven't dared try make something with the new style of big and bulky beads, I suggest you get out there and stretch yourself!

Let your creativity soar!


Thursday, March 13, 2014

Tote Makeover Tutorial

If you're like me, you have a million organizing totes everyone filled to the brim with craft items. 
You may even have so much stuff that you forget just what you have. (Only craft-hoarders will understand that one. Haha) 
Hey, I'm not judging. In fact, I'm right there with you. I need an intervention!
Well, if you are a craft-hoarder, you may not like the idea that most organizing totes are clear and everyone can see all the junk...cough cough...craft items you keep. 
To me, it all looks so cluttered, even when its organized.
So, I was fishing around Pinterest for something to fix that little problem. 
And I decided to do...drum roll please...
a Tote Makeover!
This project is very easy, but may be time consuming (I had 5 totes to makeover). If you have one, it should take you around an hour.

Here's what you'll need:
Totes (I did the totes that have drawers.)(3 medium, 2 small/tall)
Scrapbook paper
Modge Podge
Paint brush/ Sponge brush
Spray Paint (5 totes=2 cans)
Newspaper (To put under the tote when you're ready to spray it)


Step 1: Take the drawers out of your totes and make sure your tote is clean. (If you've had them for a while, they gather dust in little nooks and cranny's like nobody's business!)

Step 2: *Get a color of spray paint that will match the paper you've chosen. I chose gray so that it could match well with my room and pretty much any color of paper I chose. 
(optional step) You can sand the tote a little so the spray paint has something to grip. Or you can buy a spray paint with primer in it. They also sell spray paint especially made for plastic. Any of those options will work. If you don't, the paint will scratch off easily if scuffed.
*Spray the totes. (I did this in two sittings. I sprayed one side, waited for it to dry then flipped it upside down and sprayed the other side)

Step 3: While you wait for the paint to dry, take the drawers that you pulled out and measure the fronts for the scrapbook paper. This may be a little tricky because a lot of totes have bends in the drawer handles. It took me about two tries to get the proper size.

Step 4: Modge Podge the inside of the drawer, stick your paper to it, color side out and then modge podge the back of the paper to give it a good seal. Yes, you'll probably get modge podge on your fingers.
Be sure to press the paper into the drawer face very well, you don't want any bubbles.
(I've seen some tutorials that do this with fabric. Same basic concept as the paper)

Step 5: When everything is dry, put it all back together and fill the drawers to your hearts content. Now, it doesn't look all cluttered, but crafty instead. 
I took a few more scraps of paper that I had and made little labels for my drawers. 
Perfectly organized and neat! I love it!

I hope this tutorial helped. Now you only have one thing to ask yourself...what color of paper are you going to put inside the totes?!
Let your creativity SOAR!

Follow me on Facebook at: Matchless Designs

Thursday, February 27, 2014

A little bit of Steampunk in my Life

Steampunk: a sub-genre of science fiction that typically features steam-powered machinery, especially in a setting inspired by Victorian era or industialised Western civilization during the 19th Century.
I like to think of Steampunk as, Sci-fi meets Victorian romance, all powered by steam.

As Steampunk expands, I find myself drawn in by the uniqueness of its style and fashion.
So, this project is dedicated to my love for this crazy genre!

The basic Steampunk signature to any jewelry piece: Bronze, Gears, Wire. 
These earrings incorporate all of those signatures!
I found the bronze and copper beads in the Blue Moon Bead section of Joann's Crafts and Fabrics store and was so excited! They are perfect Steampunk beads. 
I grabbed a few gears and some 20 gauge wire as well as 26 gauge wire and set to work.


I had a lot of fun bending the wire to a shape I thought would equally display the gears as well as the beads.


Wiring everything together took some time, but after you get a flow, it's rather easy.
This earring is worthy of any steampunk outfit. I've worn these even with a casual outfit. It's a great way to sneak a little Steampunk into my every day life!


I sell a similar item in my Etsy store and I have also just opened a sister store that sells nothing but steampunk!
Check it out!


The Modern Look


      I had a few friends over the other day and we had a craft night. It is so fun to get a few minds together and see what can be made.

Our first project was a black and gold chain necklace with ribbon ties.
One of my friends is new to the jewelry world, so I had her pick out a few matching chains and I did the rest.
This necklace is very easy.
Measure out the same length of chain many times. Gather them together with a large jump ring and tie a ribbon around that jump ring. (I ended this one with a clasp because we were running low on ribbon.) 
Blue Moon Beads offers an excellent source of different colors of chain. 
You could take this simple idea that even a newbie jewelry maker could handle and run with it!
She said it was "H&M worthy".


Making something is exciting and new, but most of all, it's something to be proud of. Needless to say, my newbie jeweler friend wanted to make more. 
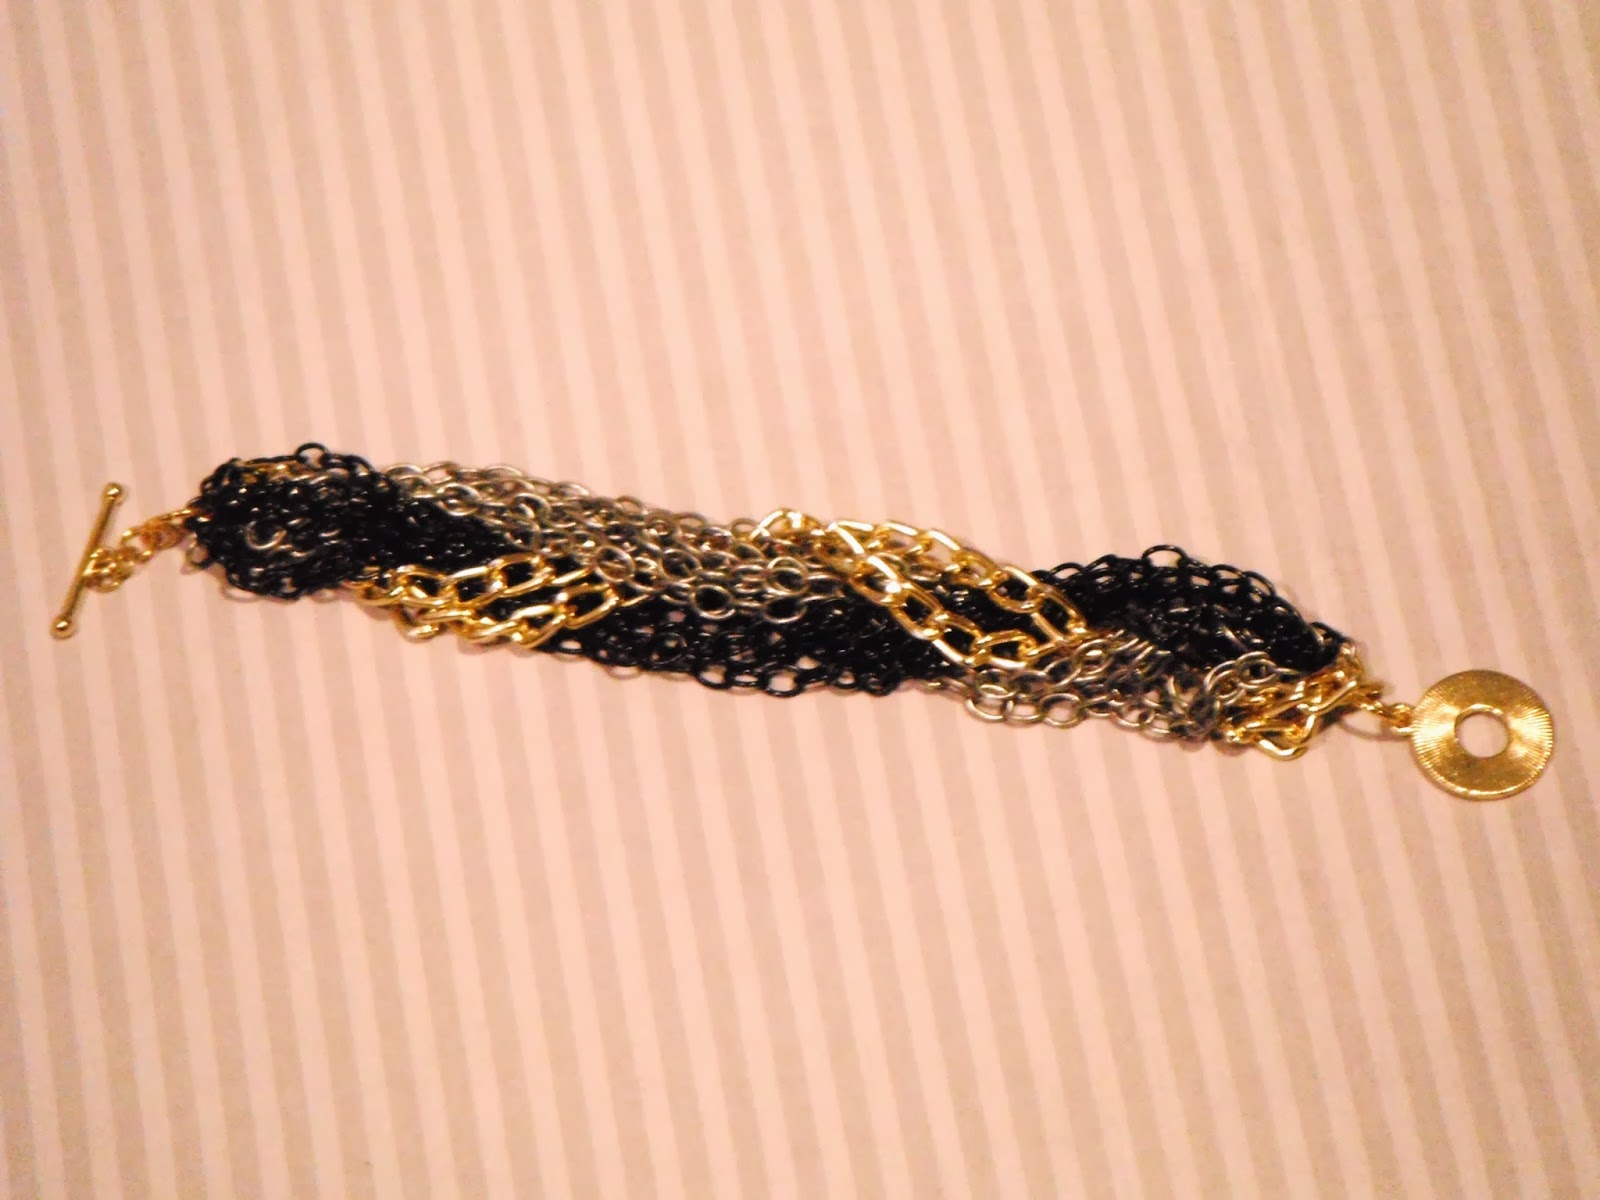
Sticking with the black and gold theme, we found some more chain and whipped together a bracelet to match the awesome necklace we made. 
Same general idea. 
Measure out chain, lots of it. Gather it into a large jump ring then braid it. When you are done, gather the lose braided ends with about jump ring and add on a clasp.


I love the chunky look. 
Give this project a try. Let me know how it goes. 
Let your creativity soar!


Monday, February 17, 2014

The Power Of Lotus

Its roots are in muddy water, but the lotus flower rises above the mud to bloom, clean and fragrant. In Buddhist art, a fully blooming lotus flower also signifies enlightenment, while a closed bud represents a time before enlightenment.

In my goody box of Blue Moon Beads, I found a pretty glittering Lotus Pendant from their store line. 
I've always loved the flower, though I never really knew the meaning. Come to find out that the meaning is very cool indeed.

What you'll need: Lotus Pendant, 2 colors of chain, Glittery beads, 2 clasp, Earring hooks, Jump rings.


I took the glittery Lotus and set it in a chain necklace with a few sparkly beads thrown in. 
I didn't want to take away from the pendant, so I kept the surrounding simple.


Since it's setting was just chain, It was so easy to make a complimenting bracelet.


And earrings!


Well, there you go. I hope you are inspired and enlightened by the Lotus!


Tuesday, January 28, 2014

A little Bit of Organization Goes a Long Way!

So, as I posted before, my roommate Wendy and I just moved into a cute 2 bedroom apartment. 
Well, it just so happens that we are both movieholics and before I moved I counted that I had over 200 movies! 
As you can imagine, that's a lot of space taken up at the entertainment center. I also was running low on moving boxes and so, I knew that something had to be done with all those lovely movies. 
I saw a picture of an ingenious idea to create less bulk of movies, without sticking them in a binder. 
Sleeves! 
I don't know why I didn't think of it before. 
But, being the crazy crafter that I am, I couldn't just do it the simple way...No, I took CD sleeves to a whole new level.

Project DVD Debulk!


Step One: Take all your DVDs and cut them up. This was rather painful at first for me. But in the end, it was liberating! I cut the cover to fit the sleeve so that I could have a nice visual of the movie I was about to watch.
I also cut the back description of the movie and glued it on the back of the sleeve. 
Essentially, I wanted all the convenience of a DVD case without the bulk.
After all of that (this took me a while...200 DVDs!)


Step Two: Create DVD dividers. I decided to organize my DVDs alphabetically (at least by letter. I am too lazy to actually alphabetize the entire thing). I put all the A titled movies with the A's. B's with B's and so on.
I found some cute scrapbook paper and added a fun little letter in the corner.
(Be sure to make the divider larger than the sleeves)


Step Three: Find a cute basket. Mine matches my dividers very well. (Gotta love Black)
I put all of it together and...


TADA! This fits so nicely on the shelf of my entertainment center and I still have all my DVDs!
They are easy to look through and easy to resort.
All of my DVDs didn't even take up the space of an entire moving box! WIN!

(I wouldn't recommend chopping up your DVDs if you ever plan on selling them. I, on the other hand, only plan to collect even more!)

Let's here your thoughts :)