Wednesday, February 25, 2015

Modge Podge DIY Teen Room Makeover (part 1)

A few months ago, I dared venture into my little sister, Sara's room. 
She is 16 now, and I was shocked and appalled to find her room had not changed a bit since we were kids! (Definitely not someplace I would like to hang out in if I were a teen)
Since I moved out, that house has turned into a bachelor pad, and it shows. 
My poor sister.


Therefore, I've decided to take it upon myself to give her a secret complete room makeover! 
DIY style.
There was a lot of thought and planning that went into this, and I had to bust out every sneaky ninja move I knew to get information out of her without tipping her off. 
I found out what colors she liked and then it was time for action!
I'm getting some help from my wonderful Grandmother. And together, we've come up with some pretty sweet DIY projects!


Here area few that I remembered to take pictures of, and some of them even have their own tutorials!


Large Name Letters


This DIY isn't too hard to do. We bought a few large letters from Joanne's craft store and I had a bunch of fun paper in the colors we're going to do Sara's room in.


1- Trace the letter onto the paper.
2- Cut it out.
3- Modge Podge the paper to the letter.

Bada-bing-bada-boom!
You've got yourself some fun letters to display on a shelf that any Teen could be proud of. Heck, I'd even hang something like that in my room. :)


Colorful Bulletin Board


I found this bulletin board at a thrift shop. It was pretty banged up, but with a little elbow grease, more fun paper and some modge podge, it looks just like new!
And the best thing is that you can make this in any color you like.


The button push pins happen to have their own tutorial, YAY! 


Colorful Light-switch Plate


I used the same paper that I used to decorate the cork board to make this little beauty.
You would be surprised how adding some color to your light-switch plate can change the feel of a room. It's just too much fun!

This is also a very simple DIY.


I still have more to do, but I think so far, she will love the surprises that we're cooking up for her.
Stay tuned for some more fun DIY room makeover projects.
(Remember, these don't just have to be for a teen room. You can do any of these projects to any of the rooms in the house. Large letters can be used to spell words, not just names.)
Think about it  ;)
Happy Crafting!


Monday, January 19, 2015

3 Easy Steps To Make Cutsie Push-Pins

My sister has a cork board and its a little drab, so I decided to give everything a face lift (without really telling her...it's a surprise. Shh!).
I decided to start small this time, unlike everything else that I attempt haha
So, this post is about making cute push-pins for the cork board that is nearly free.


What you'll need: 
Strong glue (I suggest E600)
Thumb Tacks
Buttons or broken jewelry pieces


Step one: Grab yourself a thumb tack and stick some glue on it!


Step two: Put the glued thumb tack on the back of a button or broken jewelry


Step three: Let dry. (I put mine on plastic in case the glue came through the holes. I let them dry for a few hours.)


TADA!!! 
They will be so fun for a teen room. She's going to love it!
I'm totally thinking of doing some with broken jewelry, like brooches and fun stuff for my cork board.
Oh the possibilities!

Wednesday, November 5, 2014

Steampunk Ha!!oween

This year for Halloween, I decided to go with a Disney Villain for my costume.
That's right, I chose Ursula from the Little Mermaid.


With my choice made, I realized that I was definitely going to have to tweak this character to my liking; I didn't want to do the typical purple skin and crazy white hair. Also, since I was making the costume, I realized I had no idea how to make a tentacle dress. Things looked a little grim for me, but then I got inspiration from Pinterest to put the tentacles in a HAT!

If you know me, you know that I love to make mini top hats! I jumped right on that idea, and began to piece together my costume.

(Me and my coworker, Tyson...poor unfortunate soul.)

There was much touch and go and winging it. 
It's amazing what hot glue can do!


This is what I ended up with for a Sea Witch Mini Top Hat! (It was beat up a little when I took this picture. Ignore the imperfections haha)
Here's the break down to this craziness:
Tentacles were made from wire, gauze, fabric and paint!
I found a cool little skeleton at the Dollar Store as well as some shells at Hobby Lobby.


A little hot glue, a little elbow grease and some magic words and Viola an AWESOME HAT!

Well, my costume didn't stop at the hat (I can't do anything simple). Since I was already going down the Steampunk road, I figured I needed an equally awesome necklace.

If you've ever seen the Little Mermaid, you know that a key piece of Jewelry for Ursula is the shell necklace that she captures Ariel's voice in.
I found a glob of Sculpy and started working my magic.


Clay, paint, chain, shells and beads. 
This lovely piece of art came out better than I had anticipated!

It was a great costume all together and I had a blast making it. 
I won two costume contests and got stopped everywhere that I went so people could check out the hat. 

Can't wait til next year!


Monday, October 6, 2014

Floating Beads Necklace

Not into all that clutter? Have you ever tried what I like to call "Floating Beads"?
The concept is this, instead of filling the entire bead strand with beads, you use crimp tubes to space out your beads.


It pulls together a simple and unique look. Not to mention, you use less beads!


All it takes is a bead mat that you can use to keep the beads in order and the spaces symmetrical.


I love layers, and even a simple piece like this can pull it off. 
Three strands of bead wire, a handful of crimp tubes and a few strands of Blue Moon Beads silver square beads (various sizes).


The technique is simple. I used it all the way through the necklace. 
(Note: If your crimp beads are small and slip right through the hole of the bead, you can add a clear seed bead, or even color if you would like a pop of color)


Why stop at just a necklace? 
Why not make the entire set?


Another fun note: If you use clear wire, it will look like the beads are literally floating. 


Release The Punk Within

Not everyone likes the classic look, or the simple look, or even the bulky look. This project is for those of you who enjoy the "Punk" look. 
Bright colors with an edge.


Everything in this Bracelet/Earring set screams "Look at me!"


And even better, it's super easy to put together.
I picked a few bright beads and stone chips of jasper found in the Blue Moon Beads line.
The metal bows are also their genius creation.
The colors all compliment each other and I absolutely love the difference in textures, it makes for one interesting piece.


I lined it all up on my bead board and then added some stretchy cord for an easy wear bracelet.
The earrings were just as simple; slide a post right through and hook them to earrings.

Rock your inner punk in all sorts of colors!
Let your creativity soar!


Sunday, August 31, 2014

Tree of Life


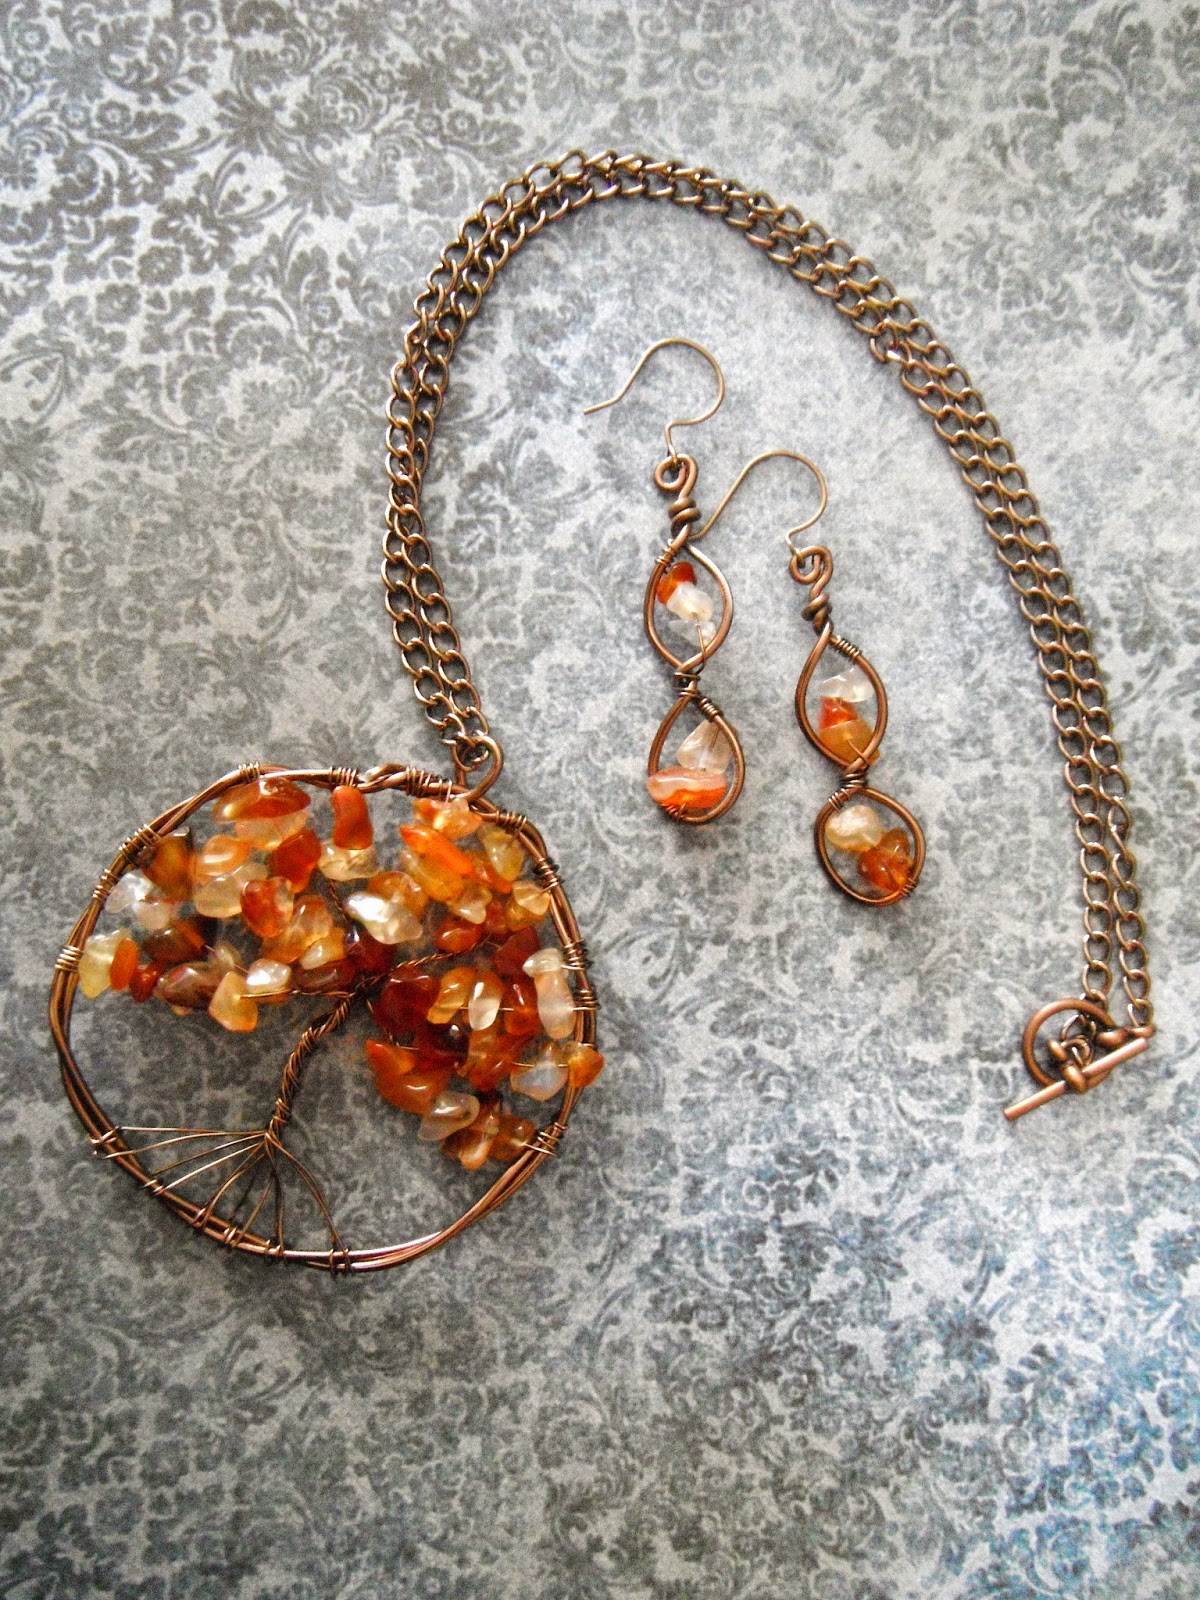
My favorite wire jewelry creation to make is the "Tree of Life".
The idea of the Tree of Life has been used in Mythology, Theologies, and Philosophies about the connection of all life on our planet.
Yeah, the meaning is cool, but making it is also very interesting. Every time I wire one of these bad boys together, it comes out different!

When I saw that Blue Moon Beads had a bunch of stone-chips on sale, I knew what my next project would be!

Two different gauges of wire (usually 18 & 26), chain, stone-ships, a clasp and clippers and you have everything you need for this project.


I've been making trees for a few years now, thanks to a tutorial on You Tube, and love them more and more every time I make a new one. 

There are so many different styles of trees you could make. 
The different color of "leaves" alone are astronomical. 

You could always replace the rock chips with seed beads or pearls. Those make for some unique trees.

For Mother's day one year, I took the birthstones of all the children in my family and made them the colors of the leaves and gave them to my mother. She loved it. It was such a cool concept that a bunch of people at my job wanted me to do that for their moms as well.

Anyway, didn't mean to rant about trees, just wanted you to know how awesome they are!
And now you know :)

If you would like to learn how to make these awesome trees for yourself and would love if I would make a tutorial on how, please comment so below. 
Thanks!


Bold and Loving it!

Hey guys,
I'm sure you've noticed that jewelry has taken on quite a layered and bold look.
I think it's a fantastic style, but some people seem to think that it means you have to wear a piece of jewelry that weighs a million pounds.
Well, I beg to differ.
This bracelet is bold and has layers and guess what? It's comfortable and easy to make!


I grabbed a couple of strands of Blue Moon Beads pearls, large flat beads, and different chains to do the job.

I wanted to create a bracelet that was striking, but also classy enough to wear with any outfit, so I chose a classic color scheme (you can make this in whatever colors you choose, of course).


It was a simple as stringing everything together and adding a clasp. 
I love the texture of the large beads!
The chain and "bling" are an excellent contrast to each other.
All in all, this bracelet eye-catching.


The bracelet is lightweight and comfortable. 
As if that wasn't enough, it doesn't get in the way, like a lot of bold jewelry does.
It goes perfectly with jeans or a skirt.
(I've been wearing it everywhere and been getting compliments all over the place!)

It's too simple not to try, so go out and make one of your own.